How to set the camera with password-less WiFi
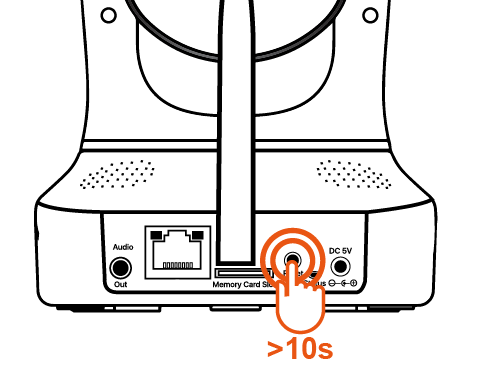
Step 1. Please keep pressing the RESET button at least 10 seconds when setting the camera in the state of electricity. Loosen the button when the red light rapid flashing. Then you will hear a “beep” sound and the camera begin restart. Wait for 2 minutes to finish the resetting.
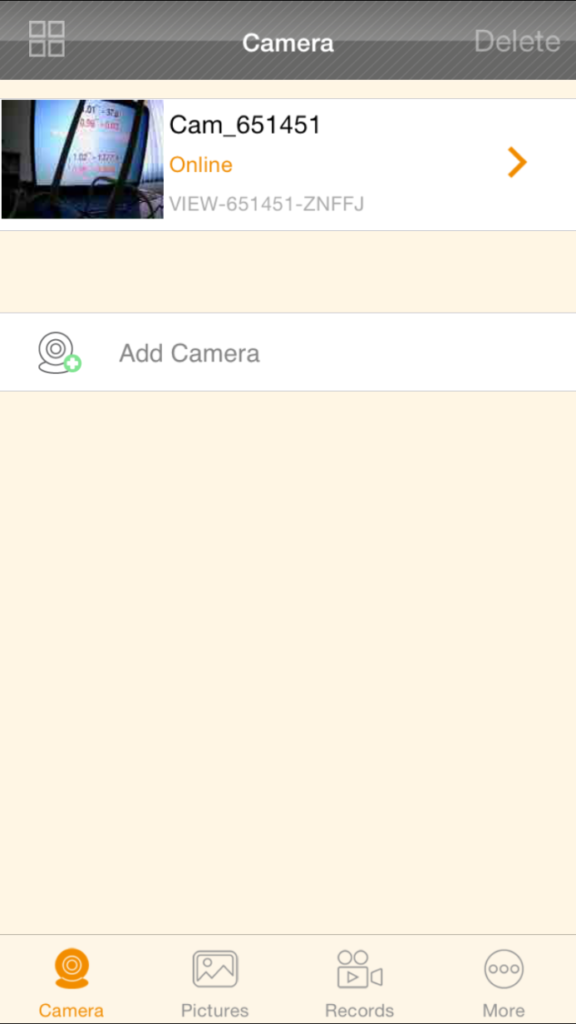
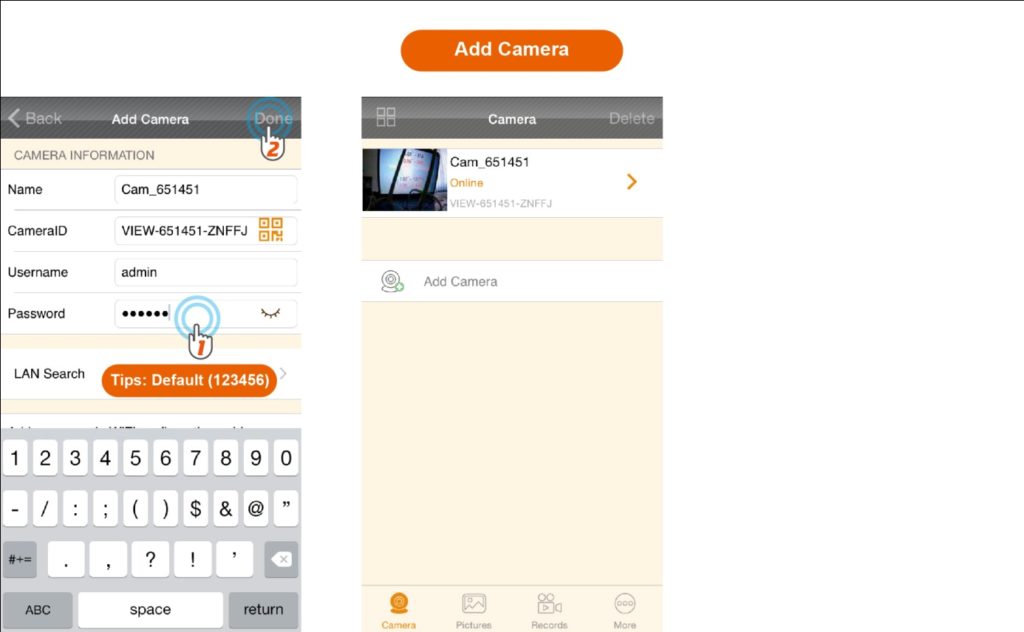
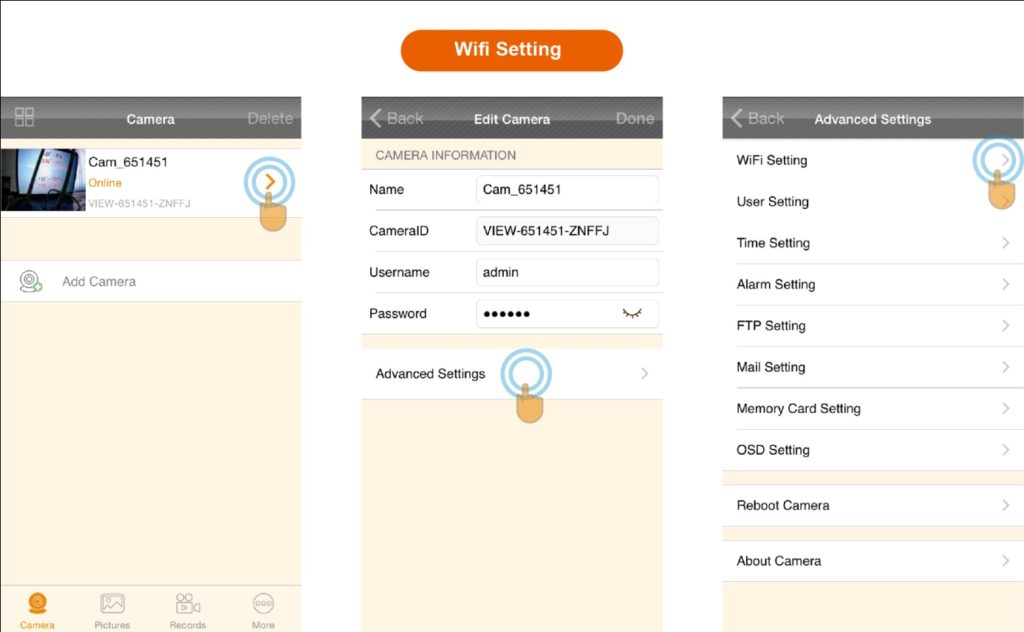
Step 2. Insert the network cable. Open the APP Faleemi to add the camera.
(Please make sure that your phone has been connected to the password-less wifi.)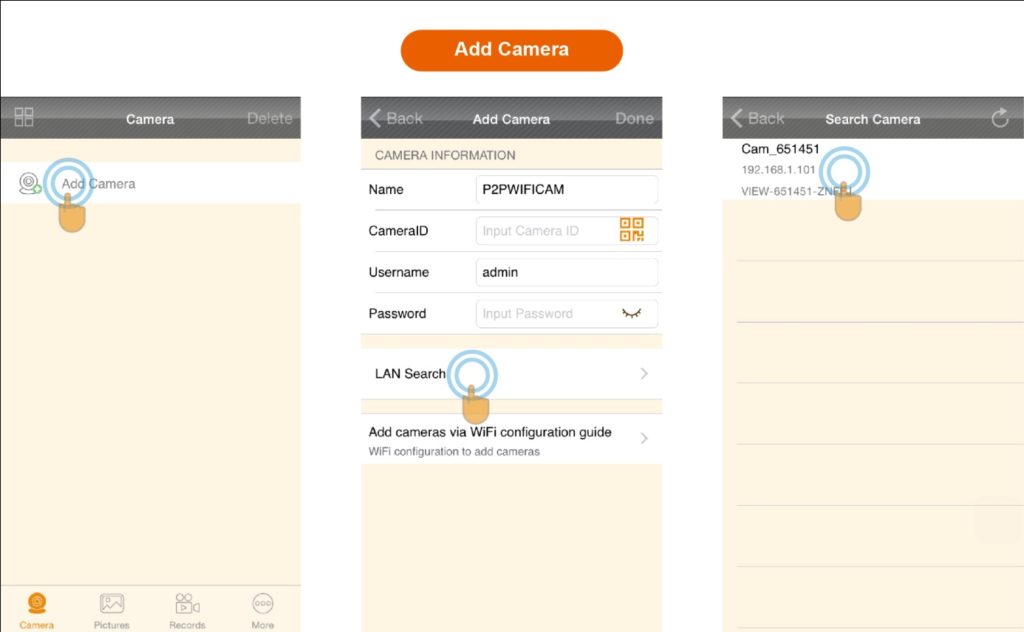
Step 3. Next, connect the IP camera to the wifi.
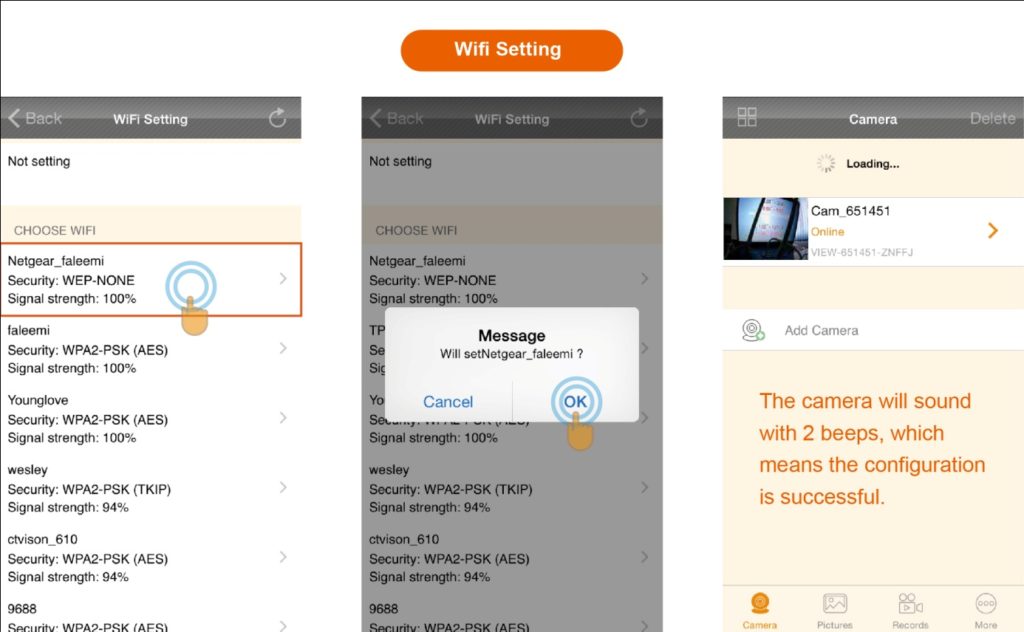
When the set the camera successfully, please keep the power on and pull out the network cable, then you can go to step 4.
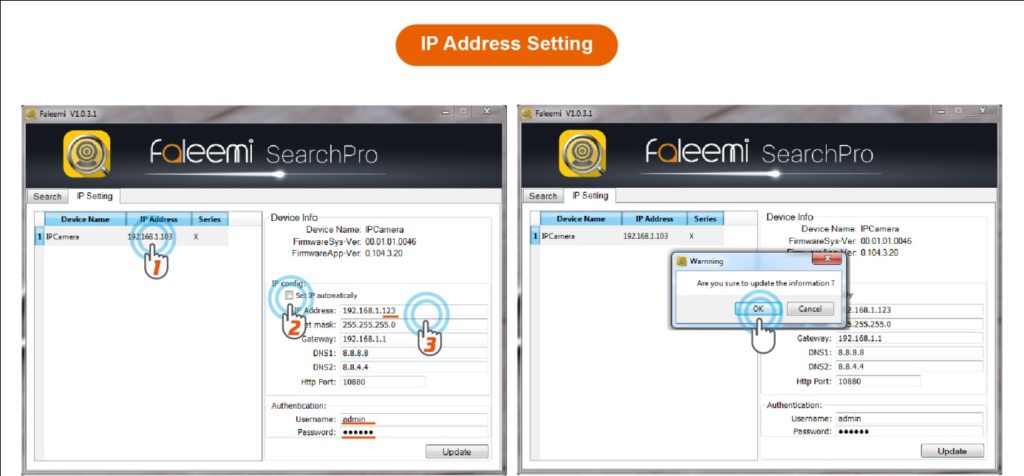
Step 4. Use the Faleemi SearchPro to set IP Address.
Get the Faleemi SearchPro in the included CD (CDROM:\Faleemi Software for Windows\ Faleemi SearchPro_v1.0.3.exe) or go to below link to download it.
http://support.faleemi.com/fsc880/Faleemi_SearchPro_v1.0.3.exe
Run “Faleemi SearchPro”

Please select [NotP2P], and click [Search] , and Click [IP Setting]

Click Your Camera, disable [Set IP automatically] by clicking the tick. Put your camera IP address, usually, you only need to change the port number to 10880 (please do not use 80, or something like this, we suggest you to use a bit more complicated number). We suggest you to use google DNS: DNS1: 8.8.8.8 DNS2: 8.8.4.4, (you can also check with your ISP to get the DNS address), put correct Username/Password, Click [Update], And then click [OK].
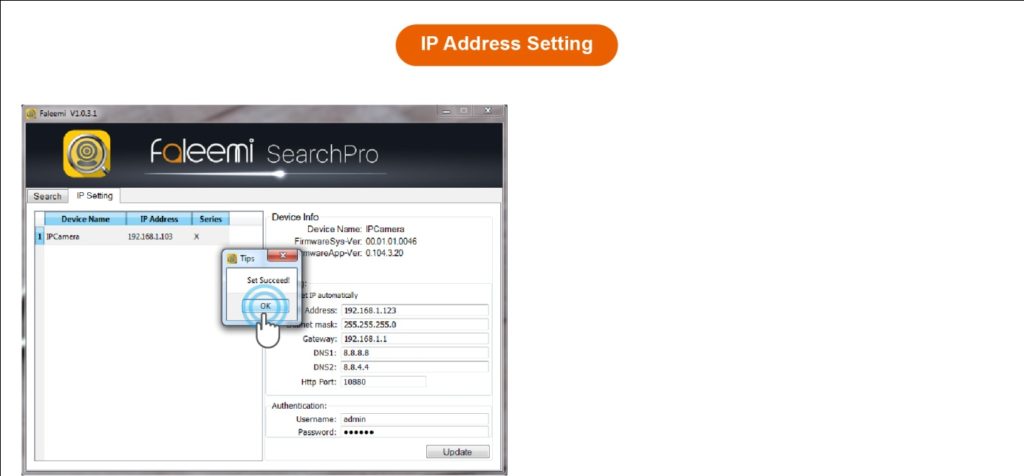
Now, your camera has set up the wireless network IP address successfully. And also the camera can be used normally even after restart.